


Simple Steps to Grow Spinach Microgreens
 Milosh Potikj
| November 23, 2023 | 8 MIN READ
Milosh Potikj
| November 23, 2023 | 8 MIN READ
Want a super easy hack to get more greens into your meals? Say hello to spinach microgreens – your new tiny, tasty garden heroes! These little guys are not just packed with nutrients; they're also perfect for anyone short on space or time.
All you need are a few basic gardening supplies, and you're set to have these nutrient-dense greens at your fingertips all year round.
In this blog post, we're going to guide you through the surprisingly simple process of growing your own spinach microgreens. Ready to turn your backyard into a mini superfood farm?
Step 1: Gather Your Supplies

- Microgreen Seeds: To begin the process, you'll first need to get your hands on some spinach microgreen seeds. These are readily available online or in local gardening stores. Given their high germination rate, a small packet can provide you with several crops.
- Containers: Next, you'll need a shallow container for planting. This could be a special microgreen tray or even a simple baking dish or egg carton. Just ensure it has some drainage holes to prevent excess water from accumulating and causing mold growth.
- Soil: Fill your container with about an inch of soil. Ideally, use a seed starting mix or potting soil, but any good gardening soil will do. Soil acts as a medium for the roots to anchor in and also provides essential nutrients for growth.
- Water: Water is crucial for the seeds to germinate and the plants to grow. You will want to keep your soil consistently moist but not soggy. A spray bottle can be useful for gentle watering, especially in the early stages.
- Lights: Finally, you'll need a good light source. Microgreens need around 12-16 hours of light per day. If you don't have access to a sunny windowsill, an LED grow light is a great alternative. This ensures your microgreens get the light they need, regardless of the weather or time of year.
Read More: Grow Sorrel Microgreens
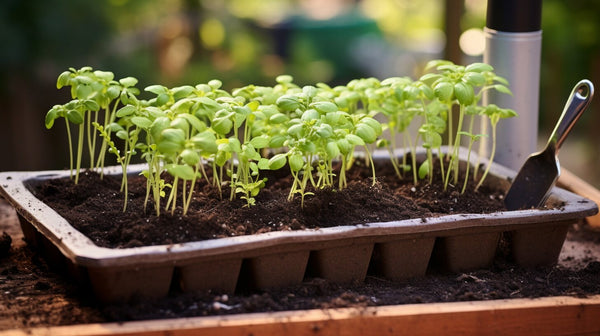
Step 2: Prepare for Planting

Planting your microgreens is an essential and fun step in the process. This is the stage where you'll get to sow your seeds and set the stage for a successful germination. Let's dive into how to best prepare for this vital phase in your microgreen journey.
Choosing the Right Soil
When selecting soil for your microgreens, ensure it's well-draining to prevent waterlogging and mold growth. Lightweight potting mixes, seed starting mixes, or peat moss are all good options. Some gardeners also use coconut coir, which retains moisture well and is pH neutral. Avoid garden soil as it can be too heavy and may contain weed seeds or diseases.
Preparing Your Containers
First, ensure your chosen containers are clean to prevent potential issues with disease or pests. Fill the containers with your chosen soil to about an inch below the rim. This leaves room for watering without the risk of water spilling over the sides. Gently firm down the soil to remove any air pockets and create a flat surface for even seed placement.
Setting Up Your Lights
Light is crucial for the growth of microgreens. If you're using natural light, place your containers on a sunny windowsill. However, if you're using LED grow lights, set them up so that they're 5-10 cm above the soil surface. As your microgreens grow, you can raise the light source. Make sure your microgreens receive about 12-16 hours of light per day for optimal growth.
Read More: How Long Do Carbon Filters Last
Step 3: Plant Your Seeds

Now that your containers are prepped, and your lighting setup is ready, it's time to sow your microgreen seeds. This step is both simple and rewarding, marking the beginning of your microgreen's journey from seed to sprout. Let's dive into the planting process.
How to Plant Microgreens Seeds
Planting microgreen seeds is a straightforward task. Begin by spreading the seeds evenly across the soil surface in your containers. Spinach seeds are slightly larger, which makes them easier to handle and less prone to clumping. After sowing your seeds, you have two options:
- Cover with a thin layer of soil: Lightly dust your sown seeds with a thin layer of soil. This helps to retain the moisture necessary for germination and shields the seeds from direct light that can hinder their growth.
- Leave uncovered: Some growers prefer leaving the seeds uncovered on the soil surface, as spinach seeds don't need complete darkness to germinate. If you choose this method, be sure to spray the seeds with water frequently to keep them moist.
Then, place a lid or plastic wrap over your containers to create a greenhouse effect, which retains moisture and heat and helps speed up germination. Be sure to remove this cover once you see the first signs of the seeds sprouting.
Care and Maintenance

Once your seeds are planted, they will need some tender love and care to grow into lush, nutrient-rich microgreens. Here are some essential care instructions:
- Watering: Keep the soil moist but not waterlogged. Overwatering can lead to problems such as mold growth and damping-off disease. A spray bottle is ideal for watering, as it provides gentle moisture without disturbing the seeds.
- Lighting: Ensure your microgreens receive at least 12-16 hours of light per day. If growing under lights, adjust the height of the lights as your plants grow to avoid "leggy" growth or burnt leaves.
- Ventilation: Good airflow is critical to prevent fungal diseases. If you're growing in a closed environment like a tray with a dome, consider removing the cover periodically to allow fresh air in.
- Temperature: Spinach microgreens like cooler conditions. Aim for an ambient temperature of 60-70°F (15-20°C).
Read More: Grow Borage Microgreens
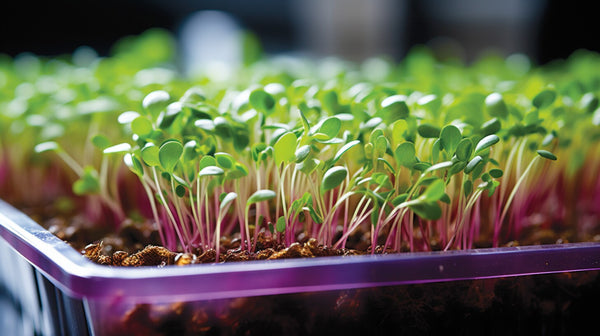
Step 4: Nurture Your Microgreens

Proper watering is vital to the health and success of your microgreens. Too little water and the seeds will not germinate; too much and you risk mold growth and root rot. To ensure optimal moisture levels, lightly mist the soil surface with a spray bottle - this is gentle enough to prevent the seeds from being disturbed.
After the seeds have sprouted, continue to keep the soil moist. However, avoid overwatering as the seedlings are delicate and susceptible to waterlogging. It's also important to ensure your container has good drainage to prevent water from pooling at the bottom.
Light and warmth are equally essential for your microgreens' growth. The seeds need ample light - about 12-16 hours a day - to carry out photosynthesis, making it important to position them on a sunny windowsill or under a grow light. Adjust the light source's height as the plants grow to prevent legginess or burnt leaves.
Regarding warmth, spinach microgreens prefer cooler conditions, around 60-70°F (15-20°C). If your indoor temperature exceeds this, consider moving the plants to a cooler location or using a fan to circulate air and reduce heat buildup.
Read More: Grow Oregano Microgreens
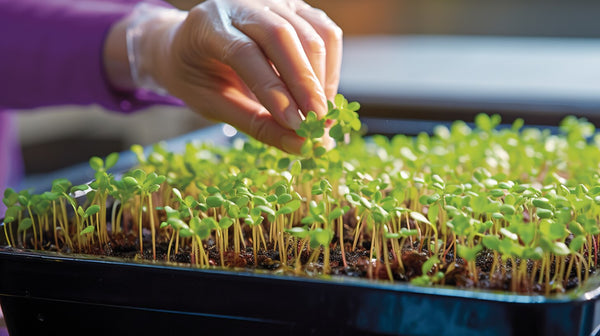
Step 5: Harvest Your Microgreens

Harvesting time for microgreens differs slightly depending on the variety, but most are ready to harvest when they have developed their first set of true leaves. For spinach microgreens, this is typically within 10-15 days after germination. It's best to harvest when the microgreens are still young, as they are at their peak of flavor and nutritional value at this stage.
How to Harvest
Harvesting microgreens is a simple and satisfying process:
- Gather your tools: A clean, sharp pair of kitchen shears is ideal for harvesting microgreens.
- Timing: It's best to harvest your microgreens just before you intend to use them, as they are most flavorful and nutritious at this point.
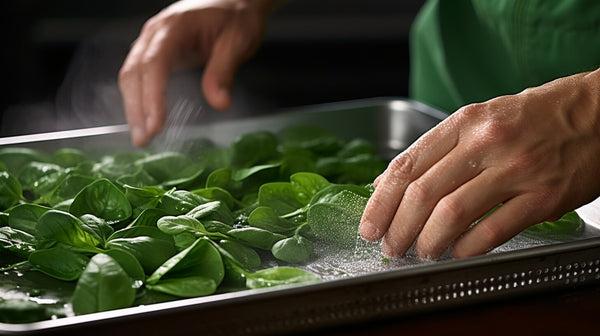
- Cutting: Using your kitchen shears, cut the microgreens just above the soil level. Be careful not to pull on the plants as you cut, as this can dislodge the soil and remaining roots.
- Handling: Handle your cut microgreens gently to avoid bruising or damaging them.
- Storing: If you don't plan to use your microgreens immediately, store them in an airtight container in the fridge. They should stay fresh for about a week if stored properly.
Read More: Grow Turnip Microgreens
Health Benefits of Spinach Microgreens

| Rich in Vitamins | Spinach microgreens are loaded with essential vitamins, including vitamins A, C, E, and K, which contribute to overall health, eye health, and bone health. |
| High in Antioxidants | They contain potent antioxidants that help fight off harmful free radicals in the body, thereby reducing the risk of chronic diseases. |
| Heart Health | These microgreens are rich in dietary fiber, which helps to lower bad cholesterol levels, thereby promoting heart health. |
| Boosts Digestive Health | The high fiber content also aids in digestion and helps maintain a healthy gut. |
| Improves Eye Health | They are rich in lutein and zeaxanthin, two antioxidants known to improve eye health and reduce the risk of age-related macular degeneration. |
| Strengthens Immune System | The high vitamin C content in spinach microgreens strengthens the immune system and helps the body fight off infectious diseases. |
| Aids in Weight Management | They are low in calories but high in nutrients, making them an excellent choice for those trying to manage their weight without sacrificing nutrition. |
Frequently Asked Questions
Can I grow spinach microgreens from any type of spinach seeds?
Yes, you can use any type of spinach seeds to grow microgreens. However, it's recommended to use high-quality seeds from a reputable source to ensure a healthy and abundant harvest.
How often should I water my spinach microgreens?
Watering needs can vary based on environmental conditions, but generally speaking, you should aim to keep the soil consistently moist. This often equates to watering once or twice daily with a fine mist from a spray bottle.
Can I grow spinach microgreens without soil?
Yes, it is possible to grow spinach microgreens hydroponically or even on a bed of coconut coir or peat moss. However, they might not be as nutritionally dense as those grown in soil, as soil contains essential minerals that plants absorb.
How do I prevent mold growth in my spinach microgreens?
Preventing mold involves careful watering to avoid over-saturation, ensuring good ventilation around your plants, and maintaining cleanliness in your growing area. If you spot mold, remove the affected plants immediately to stop it from spreading.
Conclusion
Growing spinach microgreens is a rewarding and nutritious endeavor that you can easily undertake at home, even with limited space. Whether you're a seasoned gardener or a beginner, the steps outlined in this guide will help you achieve a bountiful harvest.
Remember to ensure optimal moisture, light, and temperature conditions for your microgreens. If you're unsure of any part of the process, don't hesitate to contact us at Canada Grow Supplies.
We're here to support your journey towards sustainable, healthful living. Check out our blog for more tips and tricks to maximize your microgreen growing experience. Happy gardening!