


How To Grow Chive Microgreens: A Comprehensive Guide for Success
 Milosh Potikj
| November 25, 2023 | 9 MIN READ
Milosh Potikj
| November 25, 2023 | 9 MIN READ
Ever thought about growing your own tiny greens? It's easier than you think and super rewarding, too! Chive microgreens are the way to go, whether you're just starting out in gardening or you're already a pro with a green thumb.
These little greens are not just healthy; they're also super versatile in the kitchen. Ready to find out why you should be sprinkling chive microgreens on, well, everything? We've got you covered!
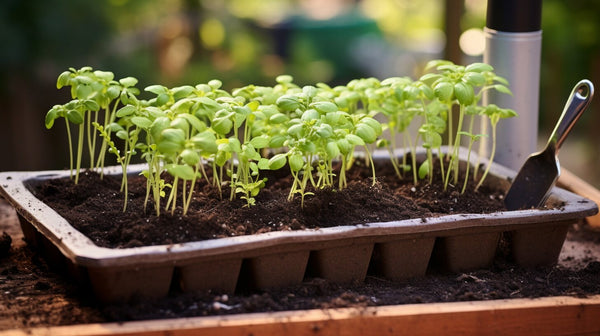
From picking the right seeds to the moment you harvest, we're here to walk you through the surprisingly simple journey of growing your very own batch of chive microgreens. Let's get growing!
Choosing Your Seeds
- Microgreen Seeds: Starting with quality microgreen seeds is crucial for successful growth. These seeds are specifically designed to grow into small, nutrient-packed greens that are harvested just after the cotyledon stage.
- Chives Seeds: Chive seeds are a popular choice for growing microgreens due to their fresh, onion-like taste. They typically germinate within 10-14 days and are ready to harvest in 2-3 weeks.
- Organic Seeds: For the healthiest microgreens, consider using organic seeds. These seeds are free from synthetic fertilizers and pesticides, providing a safer and more nutritious option for your microgreens.
- Seed Shaker: A seed shaker can be a useful tool when sowing your microgreen seeds. It allows for the even distribution of seeds across the soil, ensuring that your microgreens grow in a dense and uniform manner.
Preparing Your Growing Medium

- Soil Selection: Start by choosing a soil that's specifically designed for seed starting. This type of soil is typically lightweight, drains well, and contains a blend of nutrients that help seeds germinate.
- Layer of Soil: Place a layer of your chosen soil in your growing tray or container. The layer should be about an inch thick, ensuring enough depth for the roots to establish.
- Drainage: Good drainage is essential for preventing water-logging, which can lead to seed rot. The soil you select should allow water to pass through easily, preventing it from pooling on the surface.
- Drainage Holes: Your trays or containers should have drainage holes to let excess water escape. If your chosen container doesn't have holes, you can create some yourself using a drill or sharp instrument.
Preparing Your Trays and Containers

- Tray Selection: Opt for shallow trays, as they're ideal for growing microgreens. Make sure they're sturdy and have a flat bottom to allow for even growth.
- Container Size: If you're using containers instead of trays, ensure they're large enough to accommodate the growth of your microgreens.
- Cleaning: Wash your trays or containers thoroughly to remove any dirt or contaminants. This will help prevent diseases and ensure that your microgreens grow in a clean environment.
Ideal Water for Moistening Soil
- Water Quantity: The soil should be moist but not waterlogged. Too much water can cause the seeds to rot, while too little water may prevent them from germinating.
- Water Quality: Use cool, pure water to moisten your soil. Avoid using water that has been treated with chemicals, as these can inhibit the growth of your microgreens.
- Watering Method: A gentle spray bottle is an excellent tool for watering your microgreens. It ensures that the seeds aren't displaced, and the soil doesn't get overly saturated.
Read More: Grow Spinach Microgreens
Planting and Germination

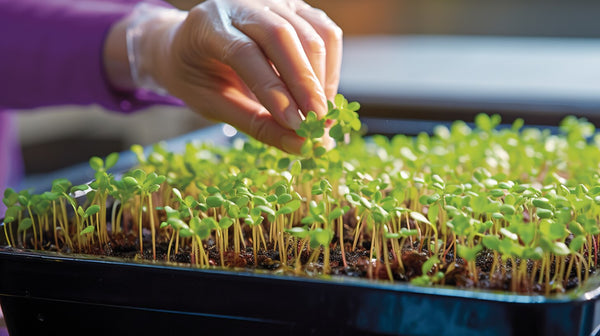
Seed Sowing Process
- Spreading Seeds: After preparing your trays and moistening the soil, you're ready for the seed-sowing process. Spread your chosen chive seeds evenly across the surface of the soil. There's no need to bury the seeds; they'll germinate just fine on top of the soil.
- Seed Cover: To create a favorable environment for germination, lightly cover your seeds with a thin layer of soil or a seed-starting mix. This retains the necessary moisture and provides the dark conditions that help chive seeds germinate efficiently.
Light Requirements
- Germination Stage: During the germination stage, chive seeds don't require light. They can germinate in the comfort of their soil cover. However, as soon as they sprout, light becomes essential.
- Post-Germination Stage: Once your seeds have sprouted, they need access to bright, indirect light. Place your trays in a well-lit area, but avoid direct sunlight, which could scorch the tender shoots. If natural light isn't sufficient, grow lights can be a great alternative.
Watering Your Seeds

- Moist Conditions: Chive seeds need moist conditions to germinate. Maintain soil moisture by gently misting it with water daily or as needed.
- Preventing Overwatering: Be careful not to overwater, as stagnant water can cause root rot and seed decay. If the soil feels wet to the touch, it's a sign that you might be overwatering.
Time and Temperature for Germination
- Time: Chive seeds typically germinate within 10-14 days. You'll notice small green shoots emerging from the soil surface during this period.
- Temperature: The optimal temperature for chive seed germination is between 60-70°F (15-21°C). Cooler temperatures can slow down the germination process, while warmer conditions can inhibit it altogether. Therefore, maintaining a consistent temperature in the recommended range is crucial for successful germination.
Read More: Grow Sorrel Microgreens
Caring for Your Microgreens

In the next section, we'll delve deeper into how to care for your growing microgreens. We will cover vital aspects, such as lighting requirements, watering techniques, and air circulation, which are essential to ensure healthy and robust growth.
Water and Air Circulation
For optimal growth, your microgreens need a balance between adequate watering and proper air circulation. The soil should be kept moist but not waterlogged to prevent the seeds from rotting. This is where a gentle spray bottle for watering comes in handy. It ensures that the soil doesn't get overly saturated and the seeds aren't displaced.
Parallelly, good air circulation is key to preventing disease and promoting strong plant growth. Proper air movement can deter the growth of mold, mildew, and other fungi that thrive in stagnant, humid environments.
Read More: Grow Borage Microgreens
Light and Grow Lights

Light is crucial for the growth of your chive microgreens, particularly post-germination. Once your seeds have sprouted, they need access to bright, indirect light. Place your trays in a well-lit area, but avoid direct sunlight, which could scorch the tender shoots. If natural light isn't sufficient, grow lights can be a great alternative. They can provide your microgreens with the exact light spectrum they need and can be controlled easily for intensity and duration.
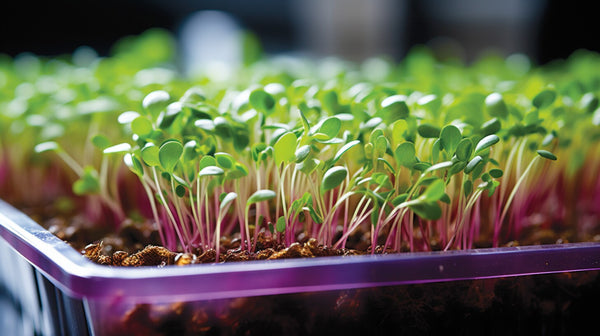
Monitoring Growth and Root Systems
Keep an eye on the growth of your microgreens. Usually, they are ready to harvest when the first pair of “true leaves” appear. The "true leaves" stage is when the seedlings resemble a miniature version of the mature plant.
The root systems of your microgreens are equally important. Healthy roots are typically white or light tan and should hold the soil together around the plant. If you notice that the roots are brown or black, it can be a sign of overwatering and poor air circulation, which can lead to root rot.
Remember, patience is key while growing chives as microgreens. Regular monitoring and appropriate care allow you to enjoy a healthy and flavorful harvest from your kitchen!
Read More: Grow Oregano Microgreens
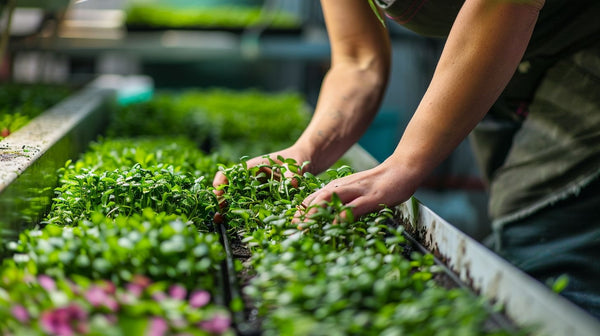
Harvesting Your Microgreens

The ideal time to harvest your microgreens is during the "true leaf" stage, which typically occurs 10-14 days after the seeds germinate. At this stage, the seedlings resemble a miniature version of the mature plant, with a vibrant green color and strong, healthy root systems.
To harvest your microgreens, use a sharp knife to cut just above the soil level, ensuring you leave the root and a small amount of stem behind. This method ensures the least disturbance to the remaining plant, increasing the chances of a second growth. It also reduces the risk of soil contamination in your harvested greens.
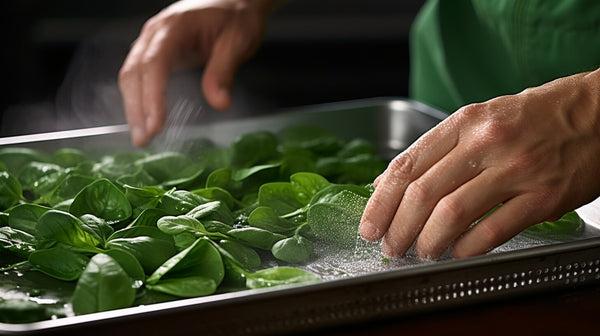
Upon harvesting, rinse your microgreens in cool water to remove any residual soil. Later, gently pat them dry using a clean towel or paper towel, or use a salad spinner to remove excess water. Store your harvested greens in a clean, airtight container in the refrigerator to maintain freshness. They taste best when used immediately after harvest, but with proper care, they can stay fresh for up to a week.
Read More: Grow Turnip Microgreens
Enjoying Your Microgreens

Microgreens offer a range of unique, fresh flavors that can enrich various dishes. Their vibrant color and distinct taste also make them excellent garnishes. Apart from their culinary uses, these tiny greens are packed with nutritional benefits, which make them a delightful and healthy addition to meals.
- Flavors: Each type of microgreen carries a distinctive flavor. For instance, chive microgreens have a mild onion flavor, while basil microgreens may add a sweet or spicy touch depending on the variety. The distinct flavors of microgreens can add a new dimension to your salads, soups, and sandwiches.
- Garnishes: Microgreens can serve as fantastic garnishes for an array of dishes. Their bright colors and fresh flavors can enhance the visual appeal and taste of your meals. Whether you use them in salads, as a topping for pizzas, or as a garnish for soups, microgreens can certainly add a gourmet touch to your dishes.
- Health Benefits: Microgreens are rich in vitamins and minerals. They are particularly high in vitamins C, E, and K. Incorporating these nutrient-dense greens into your diet can support tissue health, vision health, and overall well-being.
- Recipes: Microgreens can be used creatively in numerous recipes. You can sprinkle chive microgreens onto roasted potatoes, use mustard microgreens to add a spicy kick to tacos, or mix various microgreens to create a visually pleasing and flavorful salad. If you're making a fresh garden soup, garnish it with basil or garlic chives microgreens for a burst of flavor.
Read More: Grow Anise Microgreens
Common Troubleshoots
- Root Rot: Overwatering or poor drainage can lead to the dreaded root rot. This condition is characterized by dark, mushy roots and wilting plants. To mitigate root rot, ensure your microgreen tray has adequate drainage holes and try to maintain a balance between keeping the soil moist and not waterlogged.
- Inadequate Light: Light plays a pivotal role in the growth and development of microgreens. Insufficient light can result in leggy, weak seedlings that struggle to grow. Place your microgreens in a well-lit area with indirect sunlight. If natural light is inadequate, consider using grow lights.
- Water Level Issues: Over or under-watering your microgreens can harm their growth. The soil should be moist but not waterlogged. Microgreens prefer a slightly moist environment for growth. If the soil is too dry, the seeds might not germinate, and if it's too wet, it might lead to conditions like root rot.
- Seed and Soil Problems: The quality of your seeds and soil plays a significant role in the success of your microgreens. Old or low-quality seeds may lead to poor germination, while nutrient-poor soil can stunt growth. Make sure you're using fresh, high-quality seeds and a well-balanced soil mix designed for seedlings or microgreens. It's also a good practice to spread your seeds evenly in the tray to prevent overcrowding, which can lead to disease and poor growth.
Frequently Asked Questions
Can I reuse the soil after harvesting my microgreens?
It is not recommended to reuse the soil after harvest as it may harbor disease pathogens and pests. Always use fresh, sterile soil to sow new seeds for the best results.
Why are my microgreens wilting?
Wilting could result from various factors, including lack of water, poor air circulation, or excess heat. Make sure your microgreens receive adequate water, are in a well-ventilated area, and are not exposed to extreme temperatures.
Can microgreens grow in any container?
Yes, microgreens can grow in any shallow container that provides proper drainage. Repurposed food containers, seed trays, or even homemade wooden boxes can serve as suitable containers.
What's the difference between sprouts and microgreens?
While both are highly nutritious, microgreens are grown in soil and harvested at a later stage than sprouts. The key difference lies in their taste and texture, with microgreens offering a wider variety of flavors and a more substantial texture.
How do you grow chive sprouts?
Growing chive sprouts is an easy process. Start by soaking your chive seeds in water for about 6-12 hours to stimulate germination. Then, spread the seeds evenly over a tray filled with moist soil, ensuring they have enough space for growth.
What is the secret to growing microgreens?
The secret to growing lush, healthy microgreens lies in the balance of essential elements: high-quality seeds, nutritious soil, adequate light, and the right amount of water. It's also crucial to provide the right conditions for each type of microgreen, as some may require specific temperatures or light levels. With attention to these details, you can cultivate a vibrant, tasty array of microgreens at home.
Conclusion
Microgreens are an excellent way to add a nutritional punch and a gourmet touch to your everyday meals. By understanding their unique flavors, uses, and health benefits, you can creatively incorporate these vibrant greens into your diet.
Remember, growing microgreens at home requires attention to a few critical factors – quality seeds, nutrient-rich soil, adequate light, and proper watering. The journey from seed to harvest might present a few challenges, such as root rot or poor germination, but these issues are easily manageable with the right care and troubleshooting.
At Canada Grow Supplies, we strive to provide the necessary tools and information for a successful home-growing experience. For any further questions or concerns, don't hesitate to visit our blog or contact our team.