


How to Grow Shiitake Mushrooms: A Step-by-Step Guide
 Milosh Potikj
| 21 février 2024 | 11 MIN READ
Milosh Potikj
| 21 février 2024 | 11 MIN READ
Growing shiitake mushrooms at home is an incredibly rewarding experience, offering not only a delectable addition to your culinary creations but also a fascinating journey into the world of fungi cultivation.
Renowned for their rich, umami flavor and numerous health benefits, shiitake mushrooms have gained immense popularity among gourmet chefs and health enthusiasts alike.
This step-by-step guide on how to grow shiitake mushrooms will equip you with the essential knowledge and practical tips to successfully cultivate these savory delights, transforming your kitchen or backyard into a thriving mushroom garden.
Overview of Shiitake Mushrooms
Shiitake mushrooms, scientifically known as Lentinula edodes, are a popular edible fungus revered for their rich, savory flavor and numerous health benefits. These wood-decaying mushrooms originate from East Asia but have gained popularity worldwide due to their meaty texture and versatility in various cuisines.
Typically cultivated on hardwood logs such as oak, beech, or maple, shiitake has become a staple in both gourmet cooking and home kitchens. Mushroom farmers value these fungi not only for their culinary attributes but also for the medicinal properties they possess.
Cultivating shiitakes allows growers to produce Donko and Koshin varieties with ease, each variety offering distinct characteristics—the former being larger and more robust while the latter is smaller yet equally flavorful.
Growers often choose between several methods: cultivating outdoors on natural logs, which can take up to a year before yielding mushrooms, or indoor cultivation using sawdust blocks or straw pellets, which provide quicker results, typically within 8-12 weeks.
Notably versatile after harvesting, these hearty mushrooms exhibit an impressive shelf life when properly stored either fresh or dehydrated using tools like a dehydrator.
Benefits of Growing Shiitake Mushrooms
Growing shiitake mushrooms comes with a range of benefits, including their exceptional health benefits, long shelf-life, high-yielding harvests, and positive environmental impact. These mushrooms are not only delicious and nutritious but also sustainable to grow at home or on a small scale.
Health Benefits
Shiitake mushrooms are a powerhouse of nutrients and have many health perks. They're packed with fiber, B vitamins, and essential minerals. These mushrooms help your heart stay healthy.
They boost your immune system too. Shiitakes may also fight cancer cells and stop tumors from growing. With few calories and not much sodium, they're good for a balanced diet.
Eating shiitake mushrooms can make you feel stronger and healthier. Their beta-glucans support your body's defense against sicknesses. So adding shiitakes to your meals isn't just tasty—it's smart for keeping you well!
Long Shelf-life
After discussing their health advantages, it's worth noting shiitake mushrooms also impress with a long shelf life. These mushrooms can be kept for years if you grow them in the right conditions.
This means less waste and more time to enjoy your harvest. Once picked, store your shiitakes in a brown paper bag inside the fridge; they will last up to a week. Freshness stays locked in longer than many other vegetables, allowing you to savor their unique flavor over several days. With proper care, these cultivated mushrooms offer both durability and taste.
High Yielding Harvests
Shiitake mushrooms are bountiful producers. On a single sawdust block or grain bag, these fungi can burst into 3 to 5 harvests of plump mushrooms. The logs you inoculate today will keep giving for years.
Picture harvesting your own shiitakes every few weeks, up to six whole years from one log! Now that we understand how shiitake mushrooms can fill our baskets repeatedly let's look into the best start – preparing for cultivation.
Environmental Benefits
Shiitake mushrooms offer environmental benefits by providing a sustainable option for home cultivation, reducing the need for commercially grown mushrooms that may involve extensive transportation and energy consumption.
By using spent shiitake logs or substrates, gardeners can promote soil enrichment in their gardens or yards, contributing to a more sustainable ecosystem. Additionally, smaller amounts of spent substrate can be repurposed in worm bins to further enhance soil quality and minimize waste.
Growing shiitake mushrooms at home provide an eco-friendly alternative to store-bought options, supporting sustainability through reduced transportation emissions and promoting soil enrichment with spent logs and substrates.
Preparing for Shiitake Mushroom Cultivation
When preparing for Shiitake mushroom cultivation, you will need to decide whether to grow them indoors or outdoors and choose the appropriate substrate for your desired growing method. This step is crucial in setting up the foundation for a successful harvest of delicious Shiitake mushrooms.
Indoor vs Outdoor Growing
Both indoor and outdoor environments offer unique benefits for growing shiitake mushrooms. Indoor cultivation provides controlled conditions, protecting the mushrooms from extreme weather and pests.
It allows year-round production and easier management of humidity levels. On the other hand, outdoor growing takes advantage of natural light and airflow, reducing the need for grow lights and ventilation systems.
Outdoor cultivation can also result in larger harvests due to the potential for more extensive mushroom beds.
Read More: How to Grow Lion's Mane Mushrooms
Choosing the Appropriate Substrate
Shiitake mushrooms can be cultivated on sawdust or logs made from deciduous hardwoods. Sawdust pellets do not require sterilization, while straw or fresh sawdust needs pasteurization.
Enriching the substrate with nitrogen supplements may be needed for substrates with fewer nutrients for the mycelium. It is essential to select the right substrate and prepare it accordingly based on its specific requirements to ensure successful shiitake mushroom cultivation.
Preparing Your Shiitake Mushroom Substrate
In this section, we will cover the step-by-step process of preparing your substrate for growing Shiitake mushrooms. From preparing a growing log to prepping sawdust or straw, you'll be equipped with all the knowledge needed to start cultivating your own Shiitake mushrooms at home.
Preparing a Growing Log
- Select hardwood logs like oak, beech, or maple for optimal shiitake growth.
- Cut the logs to the desired length, typically 3 to 4 feet long and 4 to 6 inches in diameter.
- Drill holes into the log using a suitable drill bit size based on the plug spawn you have chosen.
- Insert plug spawn into the holes, spacing them evenly along the log.
- Seal the spawn-filled holes with wax to protect them from contaminants.
- Keep the inoculated logs in a shaded area with even moisture for colonization over several months.
- Monitor for any signs of contamination or dryness during the colonization period.
Preparing Sawdust or Straw
After preparing a growing log, the next step is to prepare sawdust or straw for cultivating shiitake mushrooms. Here's how to do it:
- Sourcing Sawdust or Straw: Purchase fine-quality sawdust or straw from a reliable supplier. Ensure that the sawdust is free of chemicals and contaminants.
- Sterilizing the Sawdust or Straw: Use a pressure cooker or large pot to sterilize the sawdust/straw by heating it to 160-180°F for 1-2 hours.
- Cooling and Draining: After sterilization, allow the sawdust/straw to cool before draining any excess moisture.
- Mixing with Mushroom Spawn: Once drained, mix the cooled and sterile sawdust/straw with your chosen mushroom spawn thoroughly.
- Filling Containers: Transfer the mixture into suitable containers such as grow bags or plastic bins for incubation.
- Labeling and Storage: Label each container with the date of preparation and store them in a dark, warm area for colonization by mushroom mycelium.
- Monitoring Colonization: Check regularly for signs of white mycelium growth, indicating successful colonization of the substrate.
Preparing Straw or Wood Pellets
To continue preparing the substrate for growing shiitake mushrooms, consider straw or wood pellets as an important element. Here are the steps to prepare them:
- Use high-quality straw or wood pellets, ensuring they are free from contaminants and mold.
- Soak the straw or wood pellets in hot water for 1 - 2 hours to hydrate them thoroughly and remove any unwanted microorganisms.
- Drain the excess water after soaking and allow the straw or wood pellets to cool down to room temperature.
- Place the hydrated straw or wood pellets in a container suitable for pasteurization, such as a large pot or a specialized pasteurization vessel.
- Pasteurize the substrate by maintaining a temperature between 160 - 180 degrees Fahrenheit for at least 1 hour, ensuring even heat distribution throughout.
- After pasteurization, allow the straw or wood pellets to cool completely before proceeding with inoculation.
Read More: How To Grow Lavender From Seed
Inoculating Your Substrate
Inoculating your substrate is a crucial step in the process of growing shiitake mushrooms. This involves introducing the mushroom spores into the prepared growing medium to kick-start the growth process.
Inoculating Your Growing Log
To inoculate your growing log, follow these steps:
- Prepare the logs: Fresh logs with bark intact are best. Cut them to a suitable length and diameter.
- Drill holes: Using a 5/16 inch drill bit, make holes in the log 1¼ inch deep and 6 inches apart in a diamond pattern.
- Inoculate the logs: Place shiitake mushroom spawn into each hole and tap it in using a hammer.
- Seal the holes: Melt cheese wax and seal each hole with it to protect the spawn from contaminants and keep moisture in.
- Store the logs: Keep the inoculated logs in a shaded area with good air circulation for colonization.
- Provide care: Moisturize and monitor for contamination or mold growth during the colonization period to ensure the successful growth of shiitake mushrooms.
Inoculating Sawdust or Straw
To inoculate sawdust or straw for growing shiitake mushrooms, follow these steps:
- Mix the inoculant, usually mycelium-infused grain, into the sawdust or straw. This is commonly done in a clean and sterile environment.
- Ensure that the mixture is evenly distributed to allow for uniform colonization by the mycelium.
- Place the inoculated sawdust or straw into a suitable container, such as a bag or a log, ensuring that it provides the necessary conditions for growth.
- Monitor the colonization process, which typically takes 8 - 12 weeks before it is ready to be fruited.
- Maintain optimal temperature and humidity levels throughout the colonization period to support healthy mycelial growth.
- Protect the inoculated substrate from contamination by other microorganisms during this critical phase of development.
The Incubation Period
During the incubation period, your shiitake mushrooms will develop and grow within the substrate. Different methods of cultivation may require different lengths of time for this stage. Understanding the specific incubation requirements is crucial for a successful harvest.
Incubation for Growing Logs
During the incubation period, it takes 6 to 12 months for shiitake logs to be ready for fruiting. Logs should be placed in a shady location off the ground and covered with breathable fabric. Watering depends on the climate, requiring weekly watering in moist climates and twice weekly watering in dry climates.
Incubation in a Mushroom Growing Bag
To incubate shiitake mushrooms in a growing bag, follow these steps:
- Fill the mushroom growing bag with the prepared substrate, such as sawdust or straw.
- Inoculate the substrate with shiitake mushroom spawn by evenly distributing it throughout the bag.
- Seal the bag to create a controlled environment for colonization of the mycelium.
- Place the sealed bags in a dark, humid area with temperatures between 75 - 80°F for two to three months.
- Monitor for the growth of white mycelium, indicating colonization.
- After the mycelium turns brown, usually after two weeks, move the bags to an area with indirect light to signal readiness for fruiting.
Fruiting Process of Shiitake Mushrooms
Once your shiitake mushrooms have successfully colonized the substrate, they will begin the fruiting process. This involves either allowing logs to fruit naturally or inducing fruiting in bags, leading to a bountiful harvest of delicious and nutritious mushrooms.
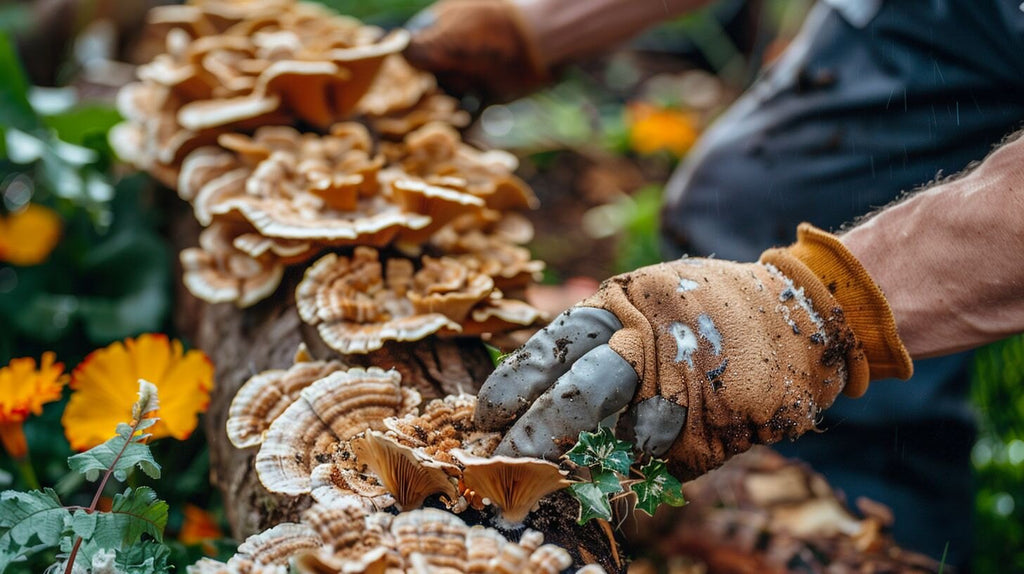
Fruiting on Logs
After soaking, shiitake mushrooms typically fruit on logs within 7-14 days. Here's how it happens:
- Colonized logs are soaked in cold water for 24 hours to induce the fruiting process.
- The mushrooms start to emerge from the log surface due to the moisture and temperature changes.
- Shiitake mushrooms develop and grow into mature forms over several days, ready for harvesting.
Fruiting in Bags
To fruit shiitake mushrooms in bags, place the mycelium-filled bags in a humid area with fresh air flow. The first flush of mushrooms can be produced within about a week.
- Ensure the bags are kept in a location with indirect light and at an ideal temperature of around 60-75°F for optimal fruiting.
- Maintain high humidity levels by lightly misting the bags to simulate natural forest conditions, promoting large and healthy mushroom growth.
- Monitor the bags closely for any signs of contamination or unusual growth patterns, as this can affect the quality and yield of the mushrooms.
- After harvesting the first flush, soak the bags in cold water for 12 - 24 hours to rehydrate them for potential subsequent flushes.
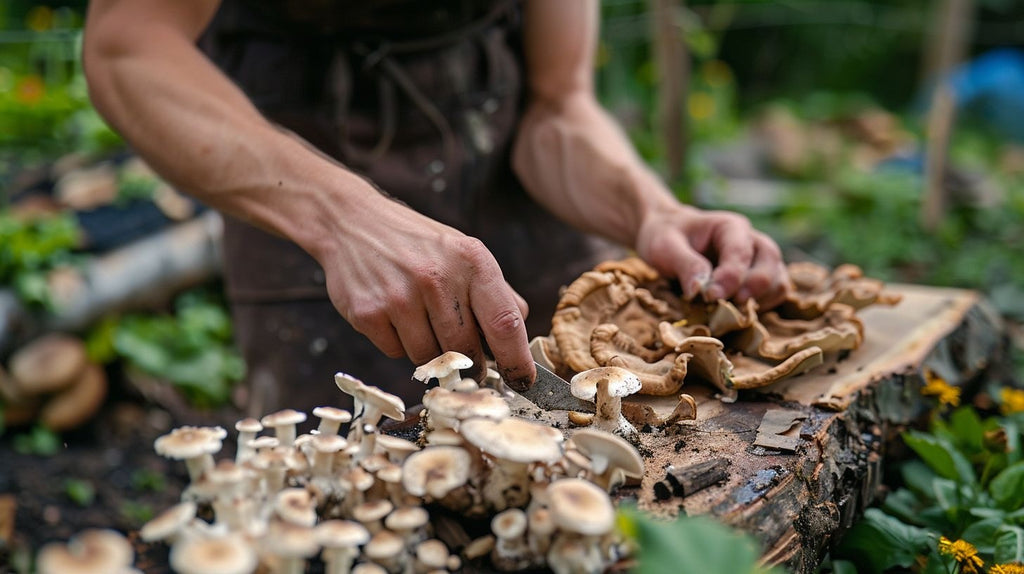
Harvesting Your Shiitake Mushrooms
Once your shiitake mushrooms have reached their peak maturity, it's time to harvest them. Proper identification of when they are ready for harvesting is crucial, and following best practices will ensure a successful harvest that can be stored for future use.
Identifying When Shiitake Mushrooms are Ready to Harvest
Shiitake mushrooms are ready to harvest when they have opened their caps, and the gills underneath are visible. Use a clean and sharp knife to cut the stem near the log or substrate, ensuring that it does not damage the growing medium. Avoid waiting too long, as this can lead to tough and over-mature mushrooms.
The development of gills on the underside of the cap indicates that shiitake mushrooms are mature and ready for harvesting. Use a clean, sharp knife to carefully cut them from the log or substrate.
Best Practices for Harvesting
Harvest shiitake mushrooms when the caps are still slightly curled under but before they flatten out. Use a sharp knife to cut them off near the log surface or bag to avoid damaging the mycelium.
Gently twist and pull to remove those with thicker stems, while smaller ones can simply be plucked. After harvesting, store them in a brown paper bag in the fridge for up to two weeks, freeze them for long-term preservation, or dry them.
Storing Post-Harvest Shiitake Mushrooms
After carefully harvesting your shiitake mushrooms, it's important to store them properly. Freshly harvested shiitake mushrooms can be stored in a brown paper bag in the refrigerator for up to two weeks, ensuring they stay dry and cool.
Furthermore, these delectable mushrooms can also be preserved for longer periods by freezing or drying them. For extended shelf life when frozen, consider blanching the mushrooms beforehand.
Dried shiitake mushrooms retain their flavor well and can last for several months when kept in an airtight container at room temperature. Remember that properly stored shiitake mushrooms maintain their nutritional value and irresistible taste.
Conclusion
In conclusion, this guide offers a thorough overview of the process involved in growing shiitake mushrooms, from initiation to harvest. By following the detailed steps outlined, enthusiasts and gardeners alike can enjoy the rewarding experience of cultivating these savory fungi.
For those looking to further their gardening journey, Canada Grow Supplies is your go-to resource. Our blog is packed with invaluable gardening tips, expert advice, and the latest trends to ensure your gardening projects are a success.
Don't hesitate to visit our blog for more insightful guides or contact us for personalized assistance. With Canada Grow Supplies, you're equipped with everything you need to turn your gardening aspirations into reality.
FAQs
What do I need to start growing shiitake mushrooms?
To grow shiitake, also known as Lentinus edodes, you need mushroom logs or blocks of fiber-rich compost that are pasteurized to eliminate harmful bacteria.
How do I prepare the logs for planting shiitake mushrooms?
First, sterilize your mushroom log by pasteurizing it to kill any unwanted bugs or mould growth. Then, inject it with shiitake mycelium, which is like the seeds of mushrooms.
Can I grow other mushrooms like chanterelles and morels the same way as shiitakes?
Each kind of mushroom has its unique needs; chanterelles and morels may require different conditions than what's needed to grow shiitakes on logs.
Why is pasteurization important when preparing a mushroom log?
Pasteurizing your mushroom log helps prevent bad fungi from growing so that only your tasty shiitake mushrooms will sprout.
Are there health benefits to eating home-grown shitake mushrooms?
Yes! Shiitakes are medicinal mushrooms that can be both savory and healthy because they contain helpful nutrients called lipids.